Applying for the UET-ETEA engineering entrance test is done fully online at etea.edu.pk — but the portal has a few one-way doors (details and photos that cannot be changed later) that trip up first-time applicants every year. This guide walks through every single screen of the application, from creating your account to downloading your roll number slip, using real screenshots of the portal and the ETEA mobile app.
- Before You Start — Checklist
- Step 1: Open the ETEA Website
- Step 2: Apply Online → UET-ETEA Entrance Test
- Step 3: Sign In or Create Your Account
- Step 4: Find Your Domicile Zone
- Step 5: The Dashboard — 3 Steps to Finish
- Step 6: Complete Your Profile
- Step 7: Add Your Education (SSC & HSSC)
- Step 8: Upload Your Photo (ETEA App)
- Step 9: Apply for the Test
- Step 10: Pay the Fee
- Step 11: Verification & Roll Number Slip
- Applying from a Mobile Phone
- Frequently Asked Questions
Before You Start — Keep These Ready
The whole application takes about 20–30 minutes if you have everything at hand:
- Your CNIC / B-Form number (this becomes your login ID)
- SSC (Matric) and HSSC (FSc) details — board, year, roll number, marks (DMCs in front of you)
- An active mobile number (not ported/converted — ETEA sends SMS alerts to it)
- A working email address you check regularly
- An Android phone — the profile photo can only be taken through the official ETEA app
- Your domicile district (we list all zones below)
Step 1: Open the ETEA Website
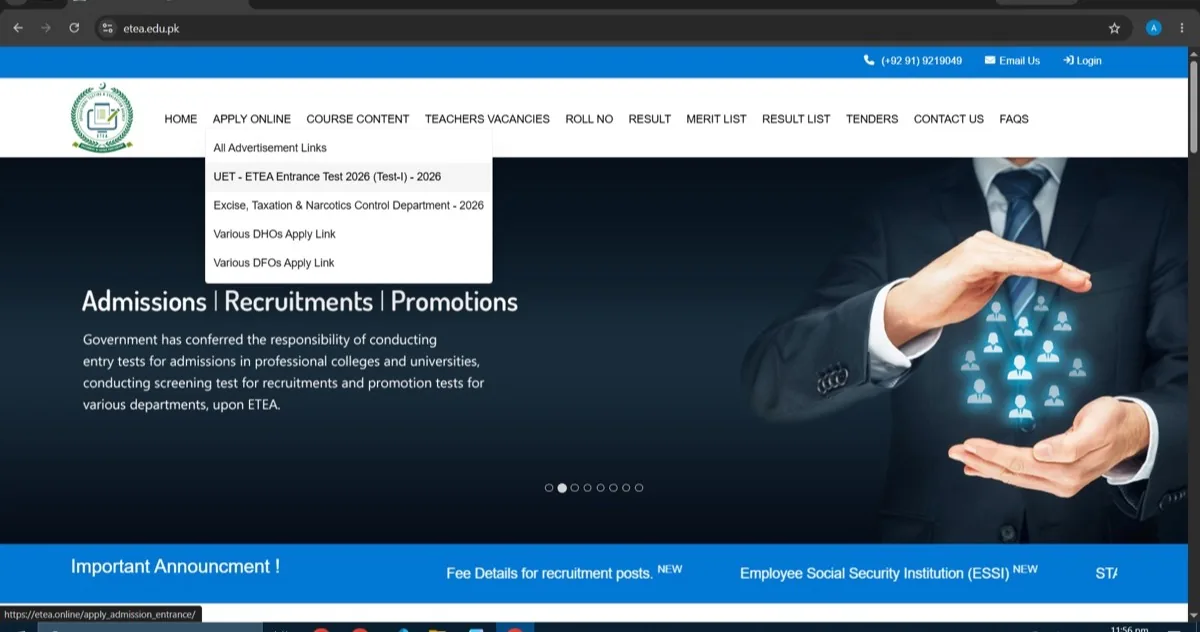
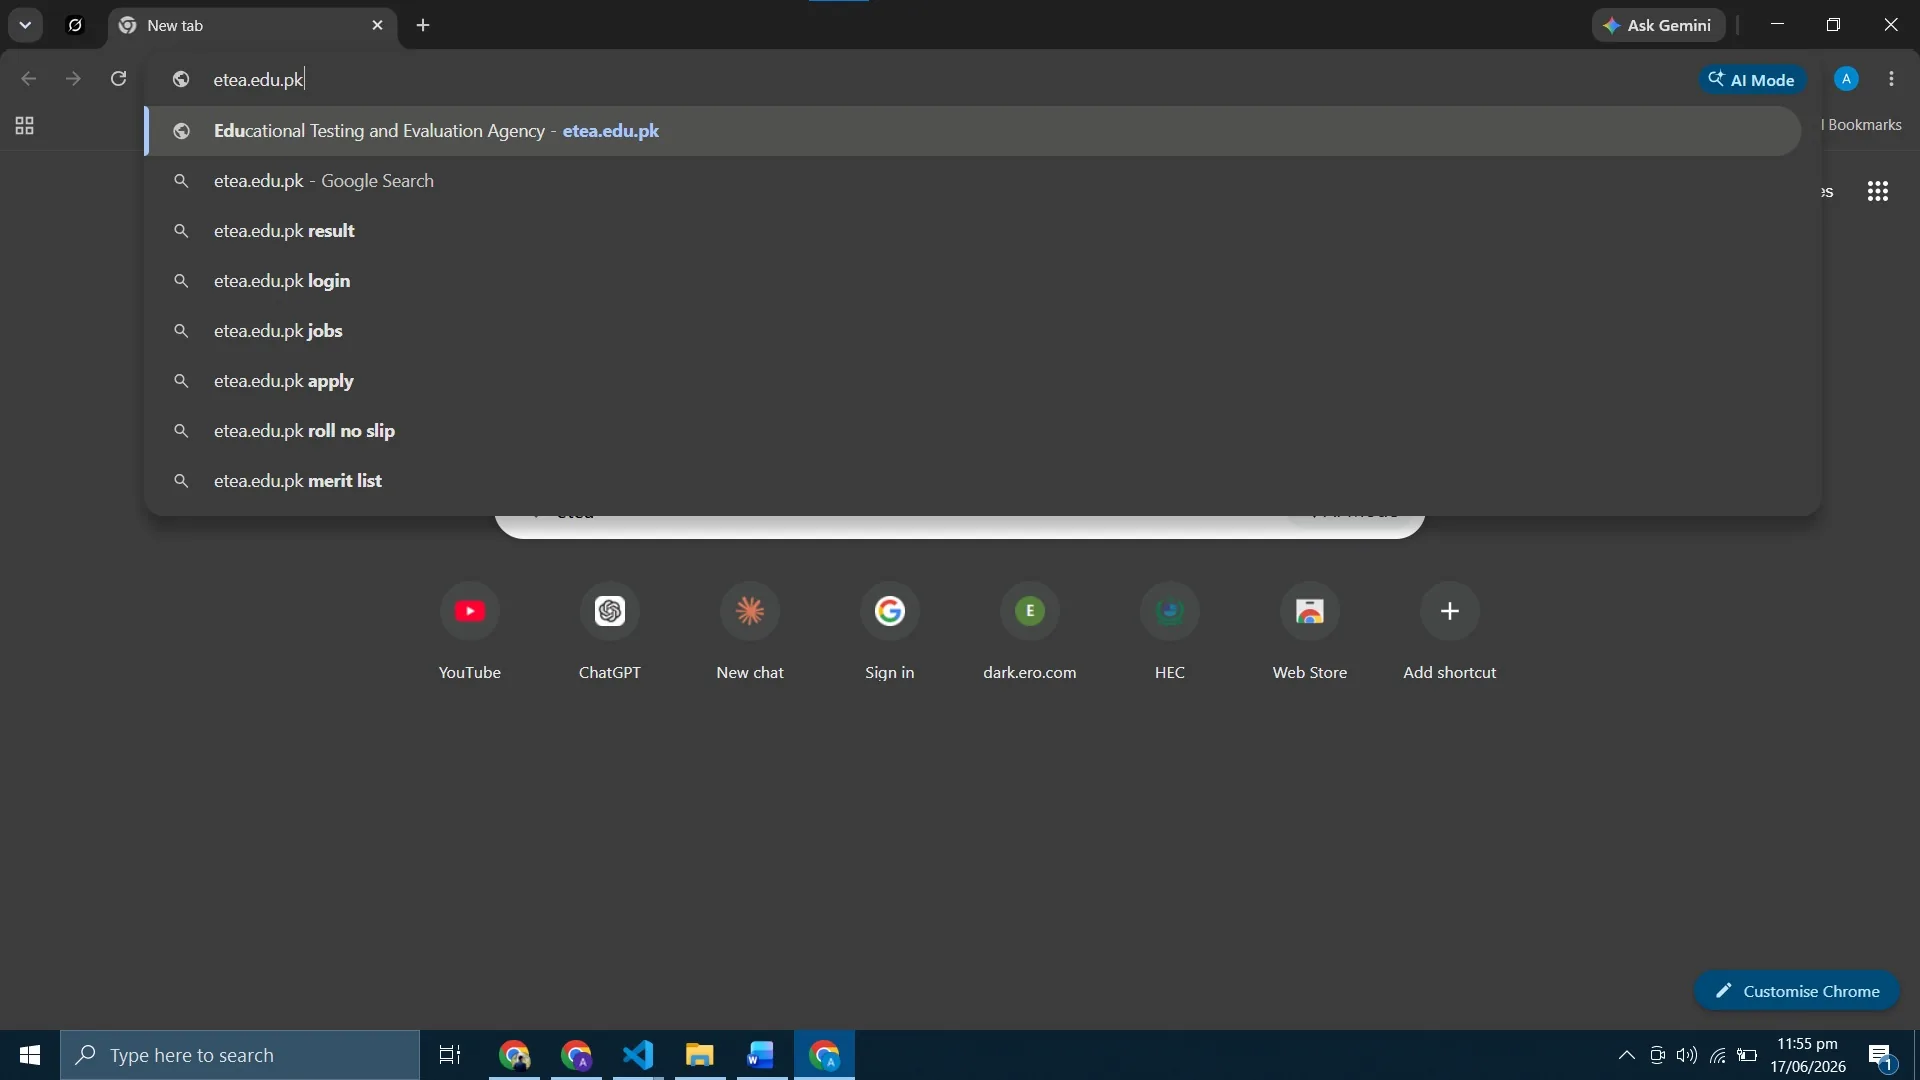
Search "etea" on Google — the first result is the official site — or type etea.edu.pk directly into your browser.
Step 2: Apply Online → UET-ETEA Entrance Test
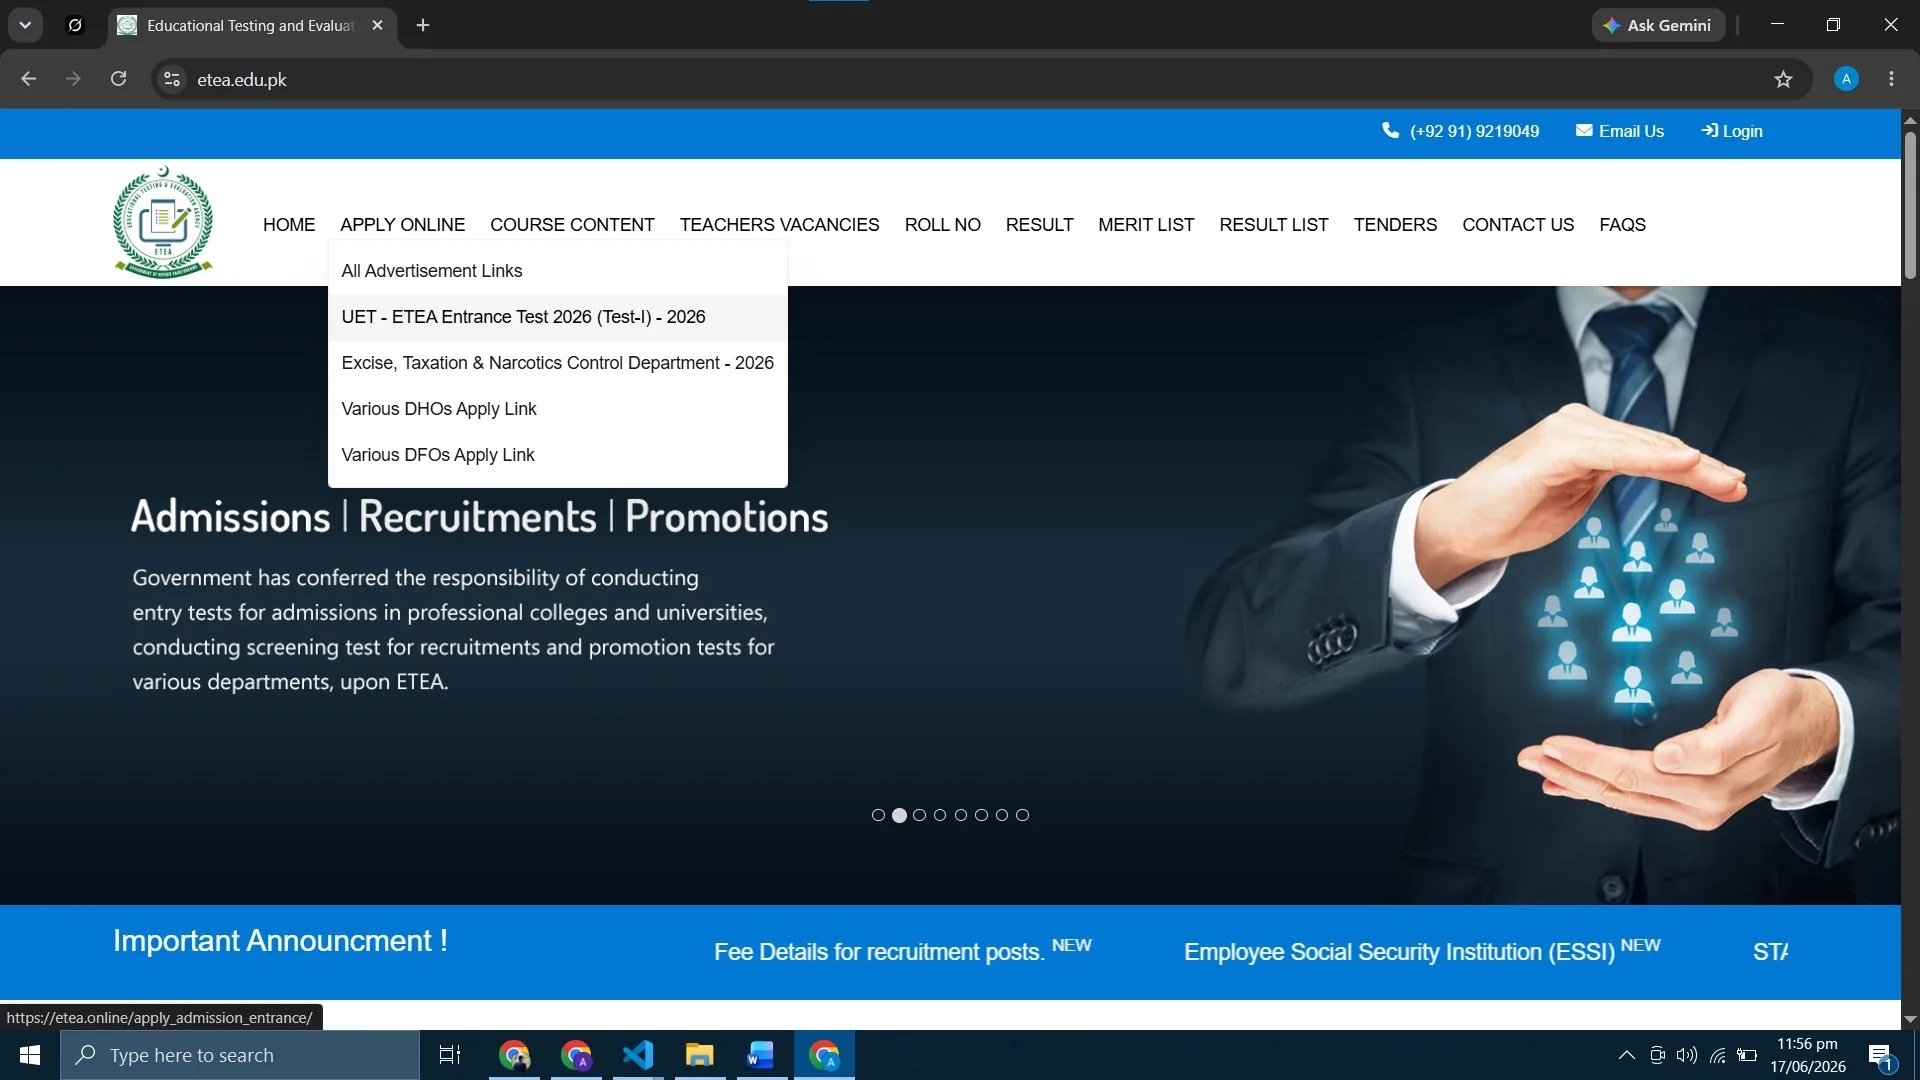
On the homepage, hover your cursor over APPLY ONLINE in the top menu and select the entry that starts with "UET - ETEA Entrance Test" — for example UET - ETEA Entrance Test 2026 (Test-I). If a second attempt window is open you may see (Test-II) instead; pick whichever test cycle is currently accepting applications.
Step 3: Sign In — or Create Your Account
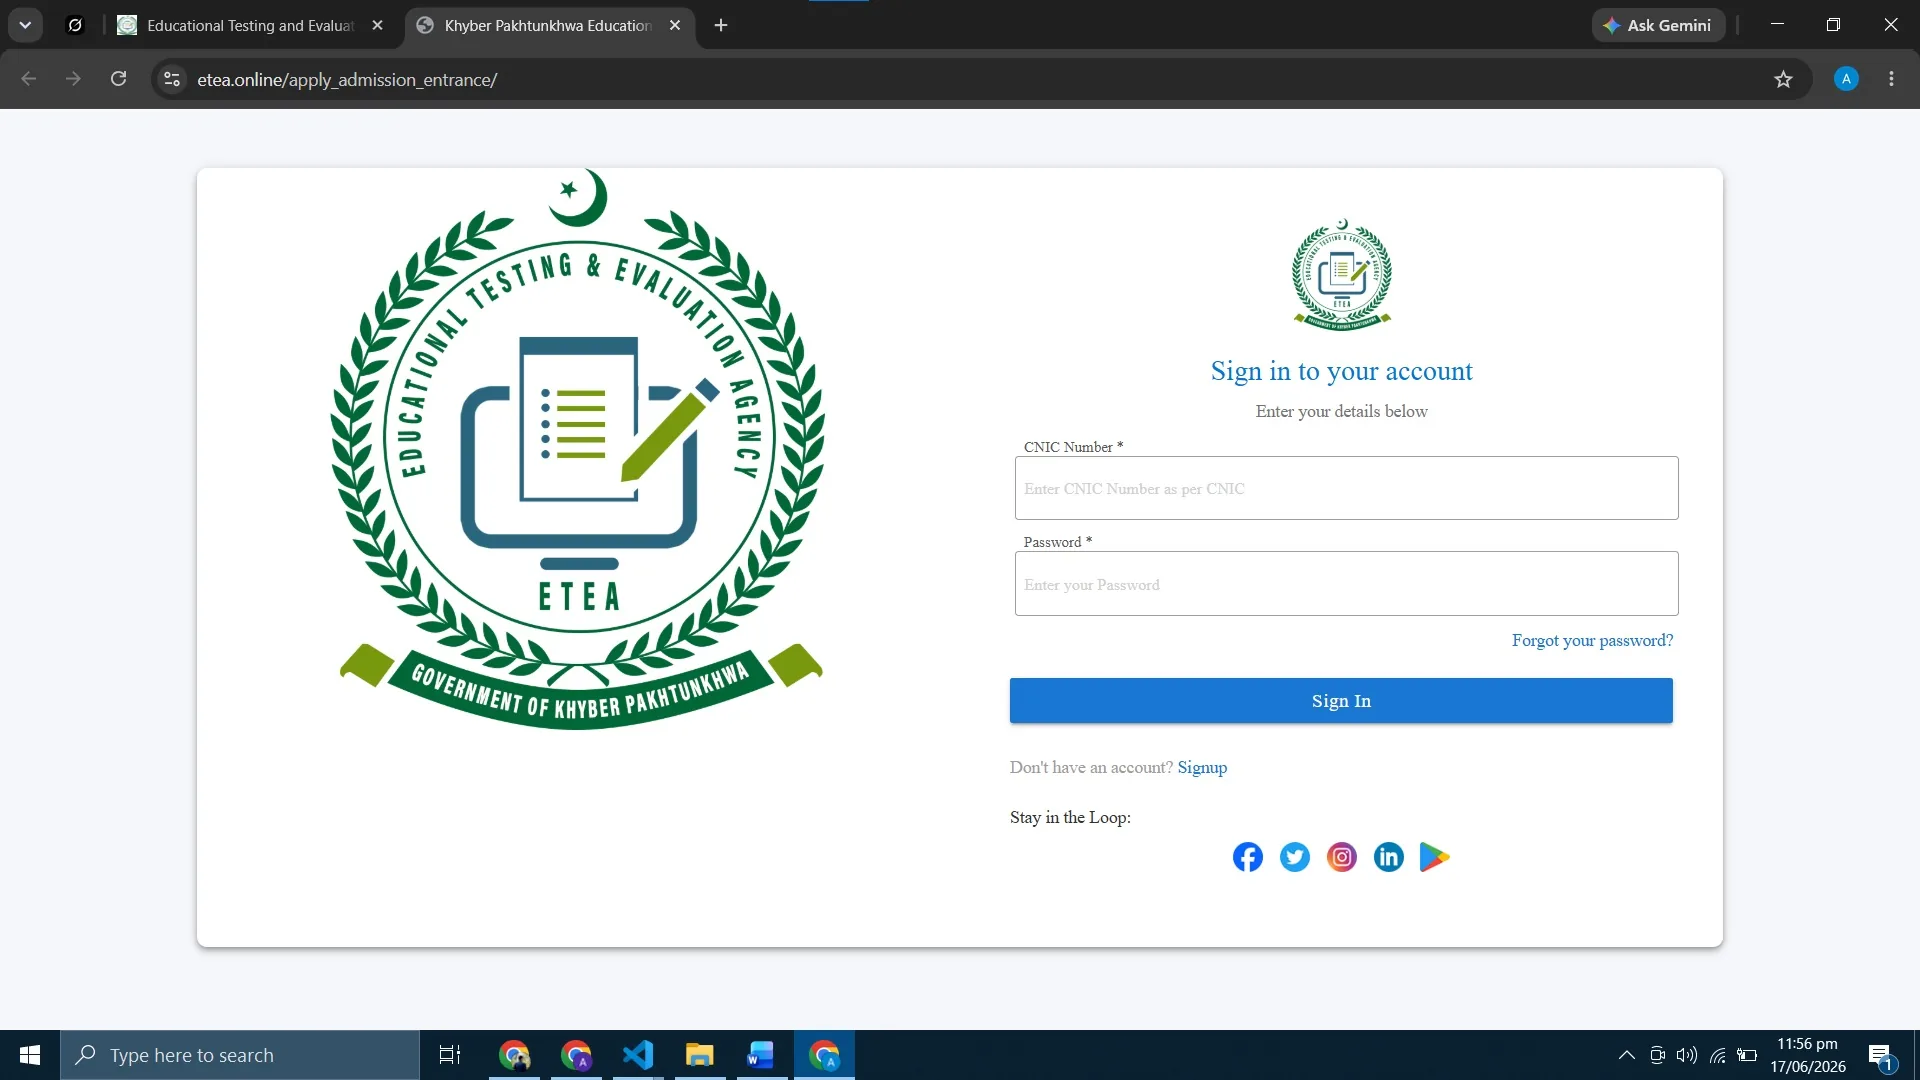
You'll land on the sign-in page. If you already have an ETEA account, enter your CNIC and password and press Sign In. If not, click the blue Sign Up text below the Sign In button.
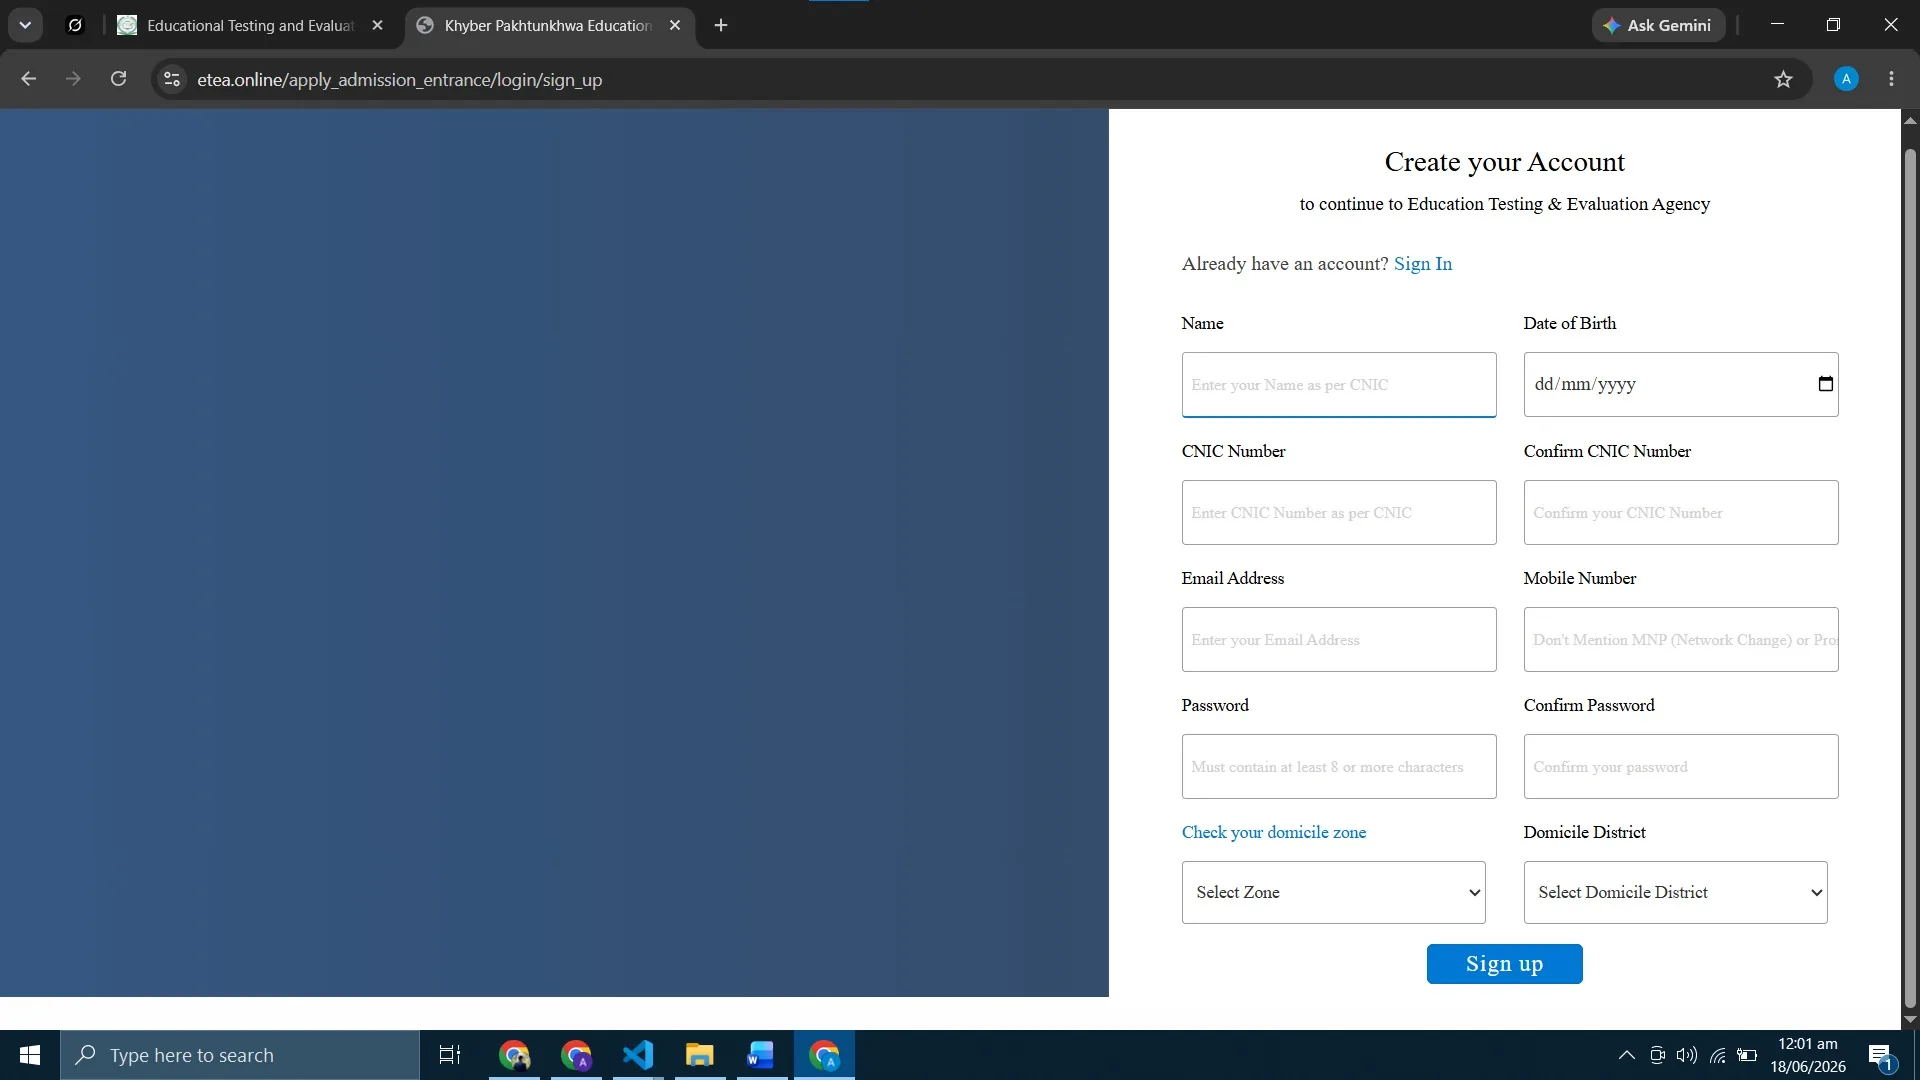
On the sign-up form, enter your details exactly as they appear on your original documents — name, father's name, CNIC, date of birth, mobile number and email. These cannot be edited once the account is created.
Step 4: Find Your Domicile Zone
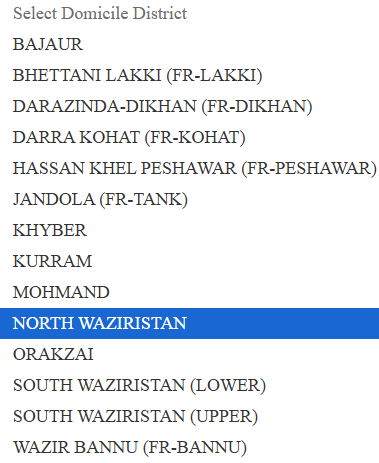
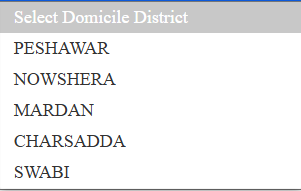
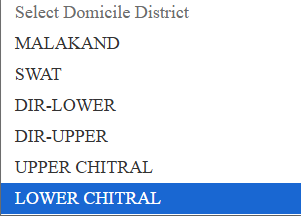
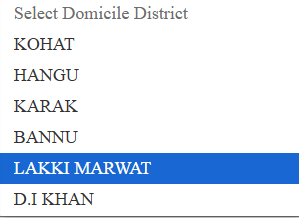
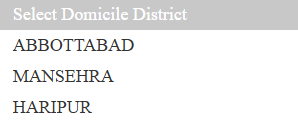
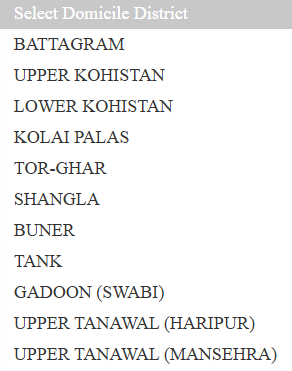
The trickiest field on the form is Select Zone. KPK's districts are grouped into six zones, and you must pick the zone that contains your domicile district — then select the district itself. Applicants from outside KPK simply pick their region instead (Punjab, Sindh Rural/Urban, Balochistan, Gilgit-Baltistan or Azad Jammu & Kashmir).
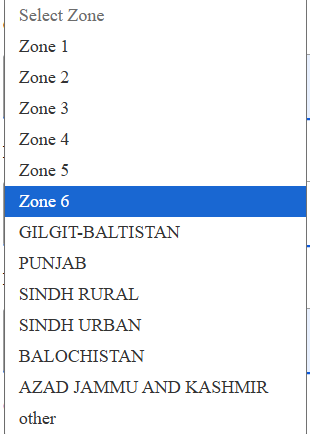
Not sure which zone your district falls in? Here is the complete district list for each zone:
Step 5: The Dashboard — 3 Steps to Finish
Once your account is registered you land on your dashboard. Everything left to do is organised into three steps, in order:
- Complete Profile
Personal details, domicile and (if applicable) disability claim.
- Upload Picture
Done through the ETEA Android app — not the website.
- Apply Online
Choose your test category, submit, and generate the fee slip.

Step 6: Complete Your Profile
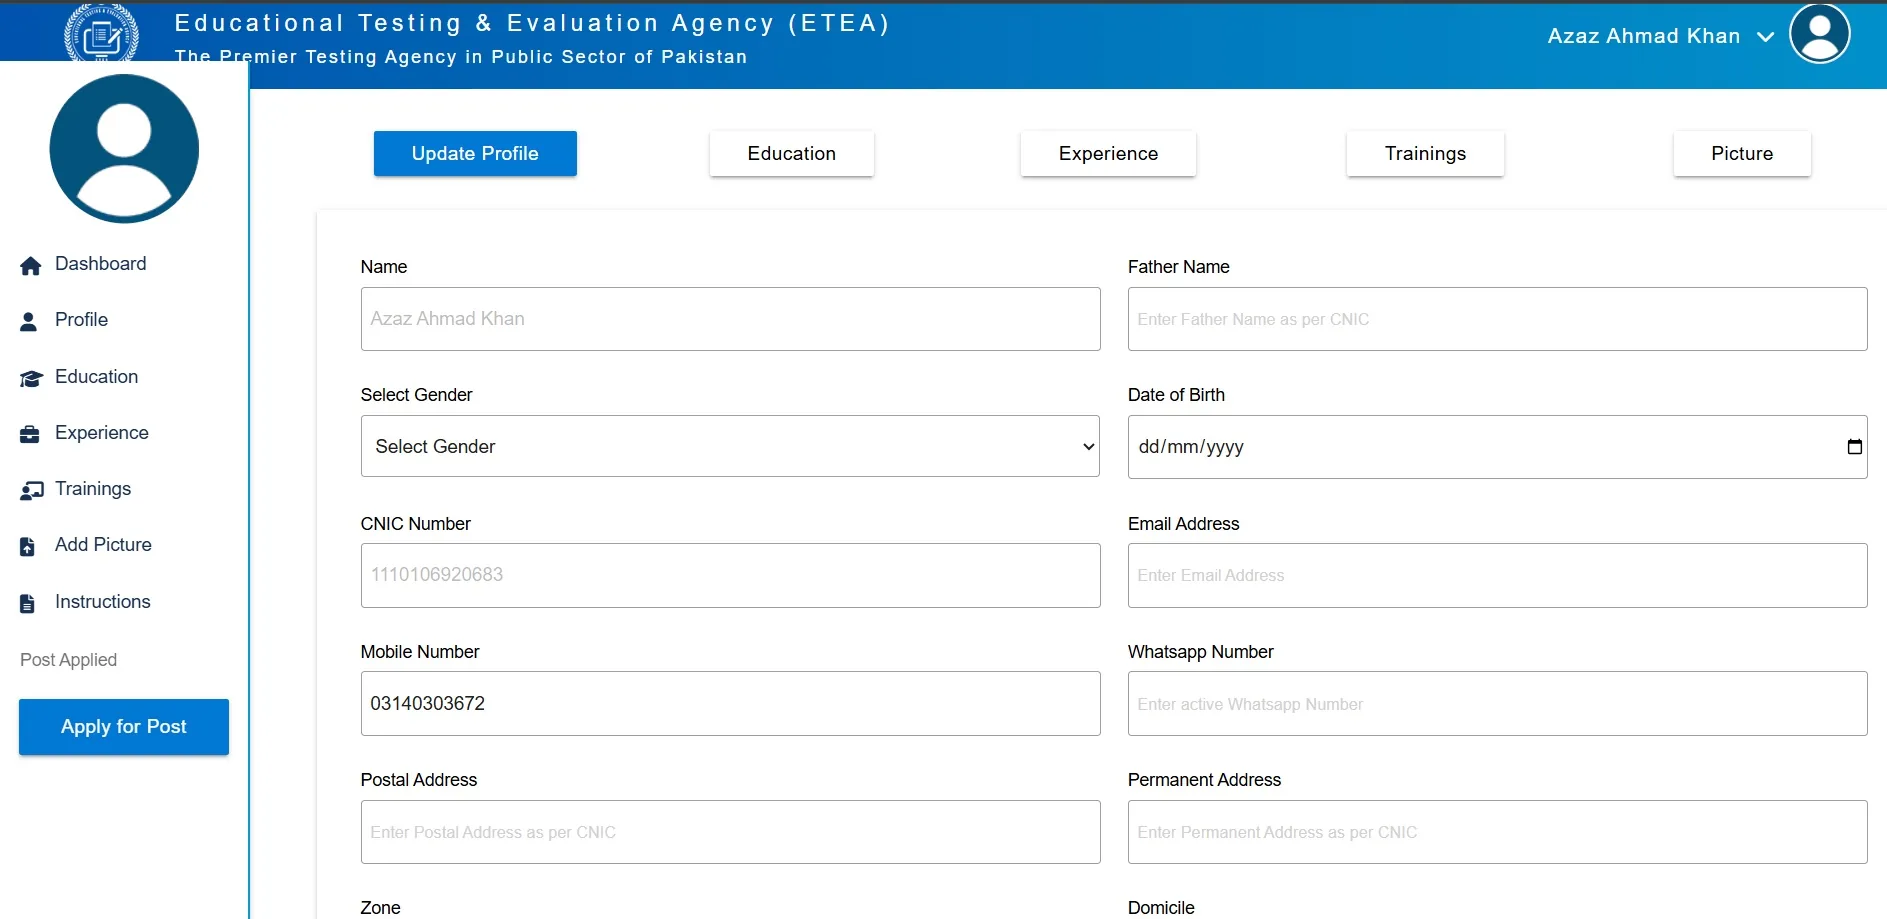
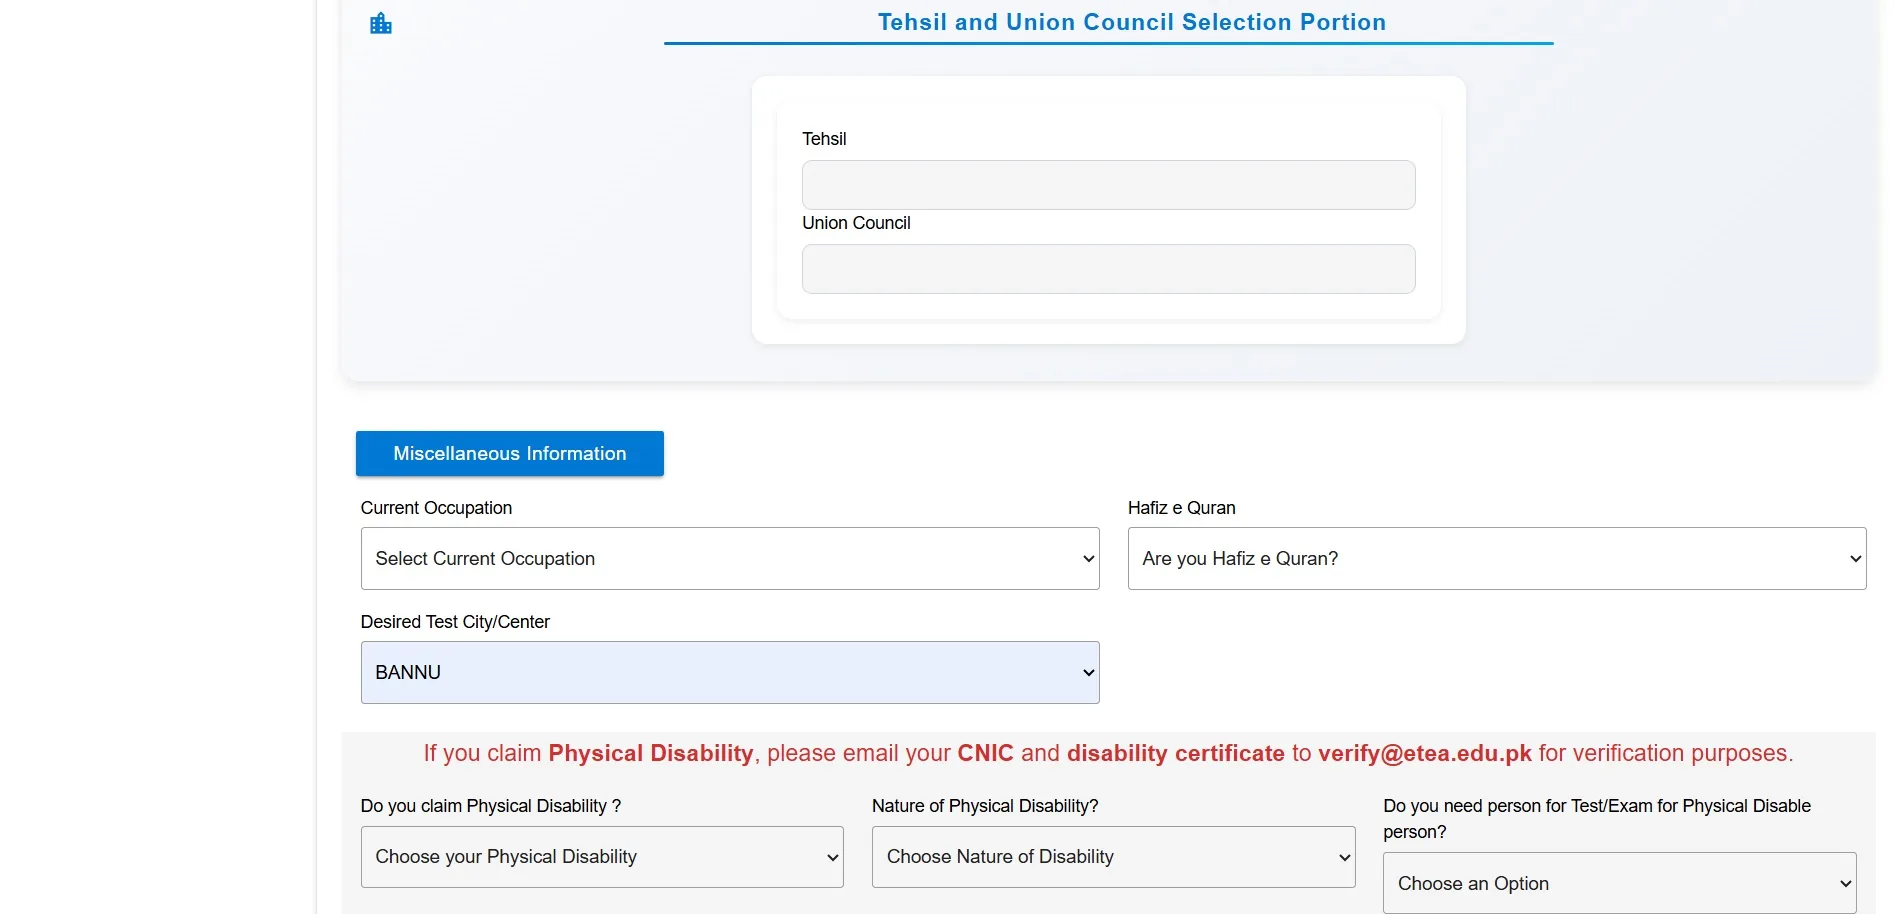
Open Profile and fill in every field according to your documents — CNIC, domicile and personal particulars must match exactly, because these are cross-checked at document scrutiny later.
Step 7: Add Your Education (SSC & HSSC)
For the engineering test you're eligible with FSc (or equivalent HSSC). In the Education tab, click Add Education and enter your records in order — SSC first, then HSSC.
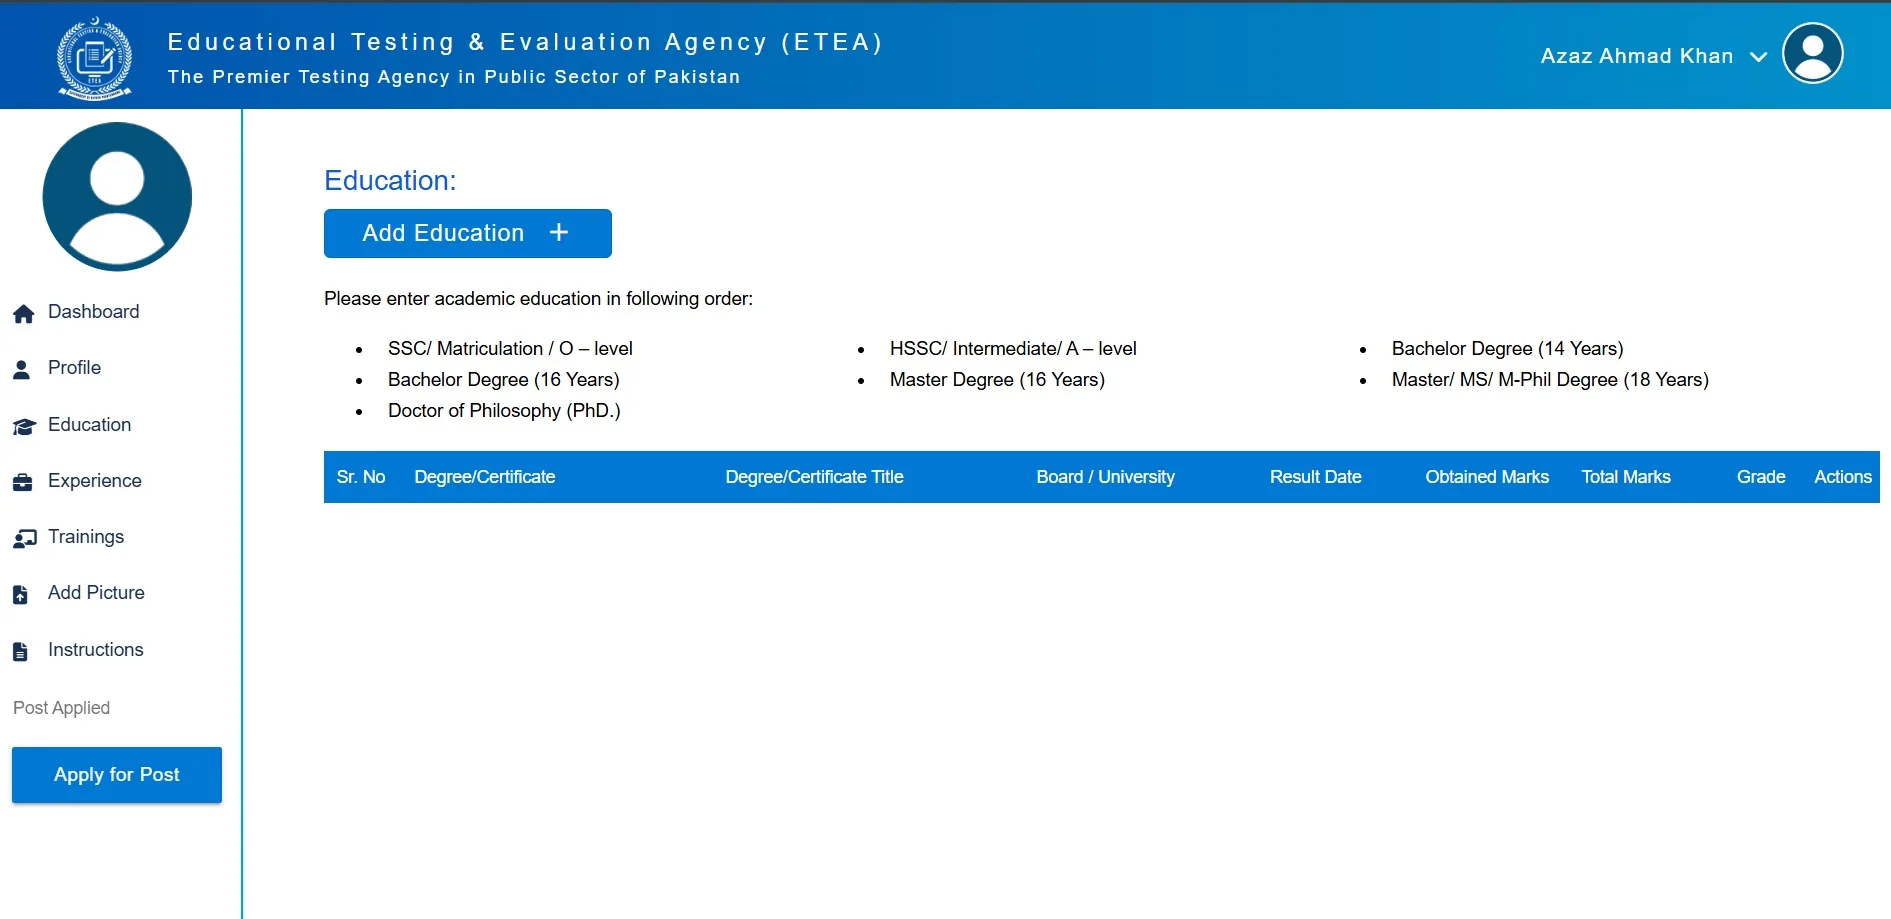
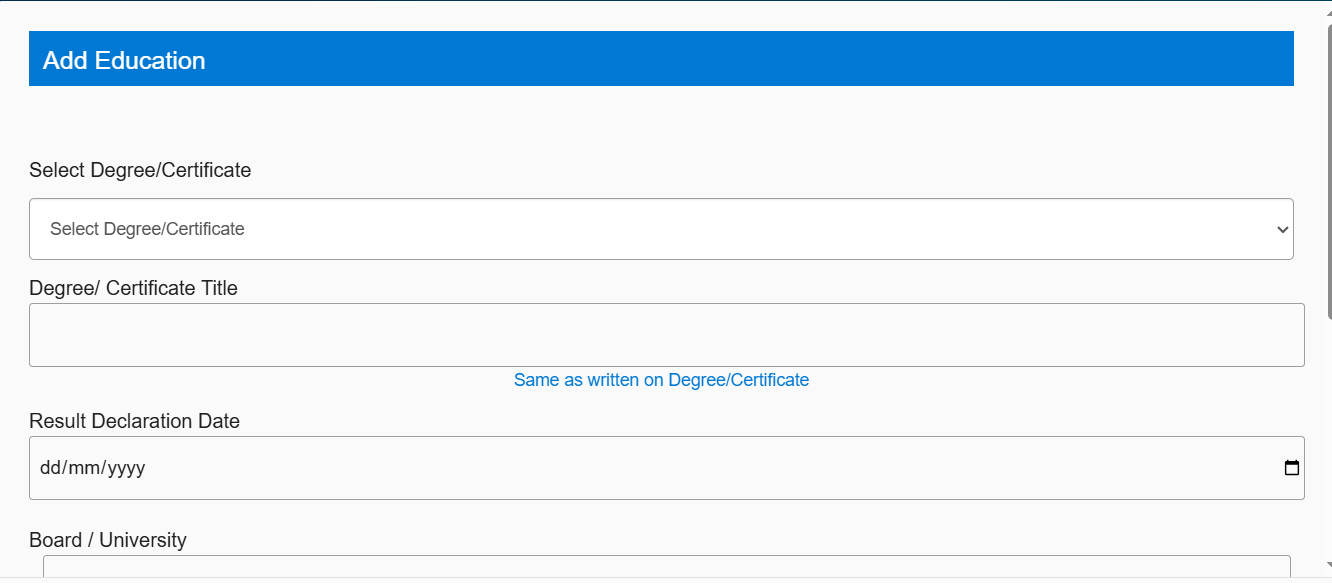
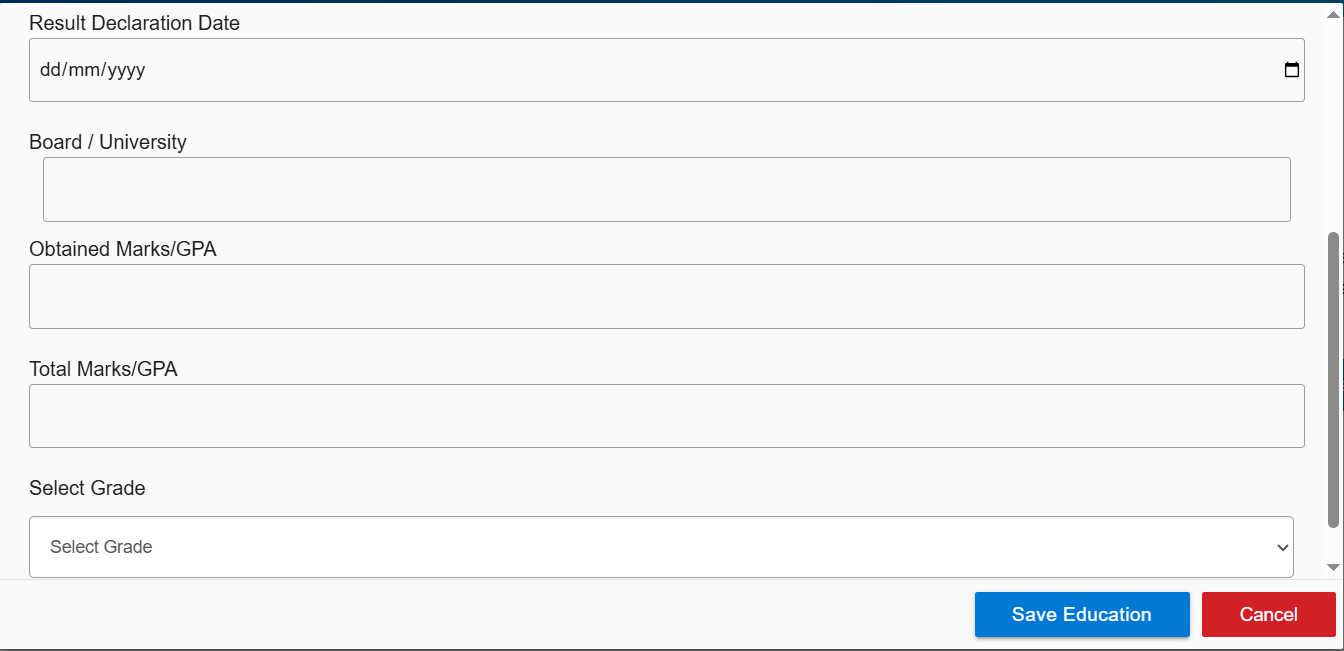
Press Save Education and your academic record is stored.
Step 8: Upload Your Photo — via the ETEA App
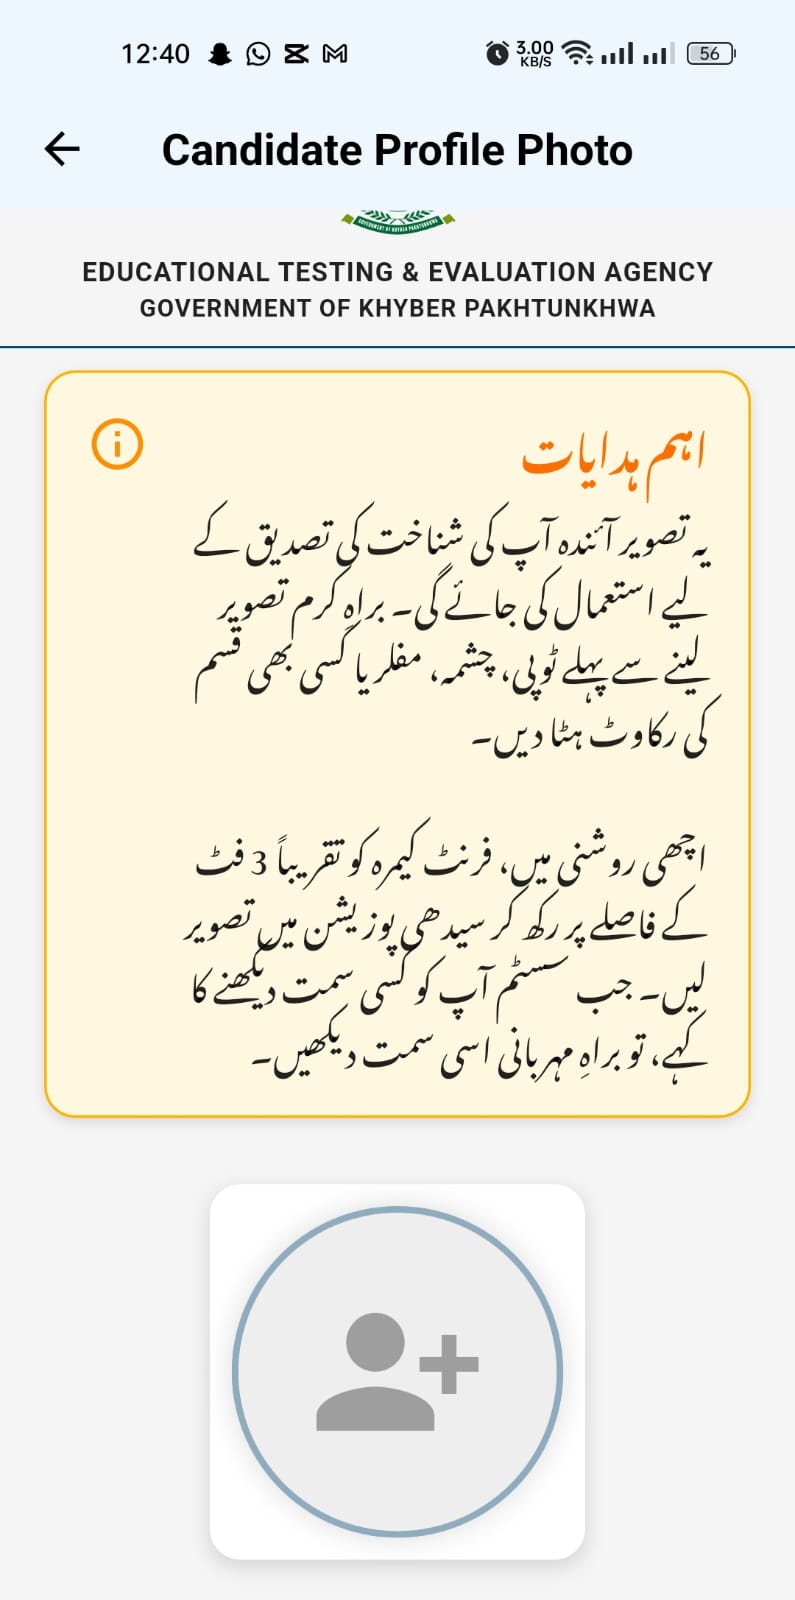
Click Add Picture in the left side panel. The website itself won't take your photo — it shows instructions telling you to install the official ETEA app from Google Play. This is a liveness-style capture: the app opens your camera and directs you to move your head.
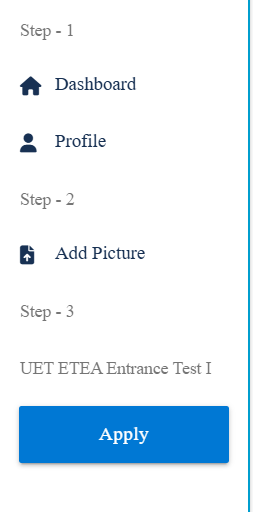
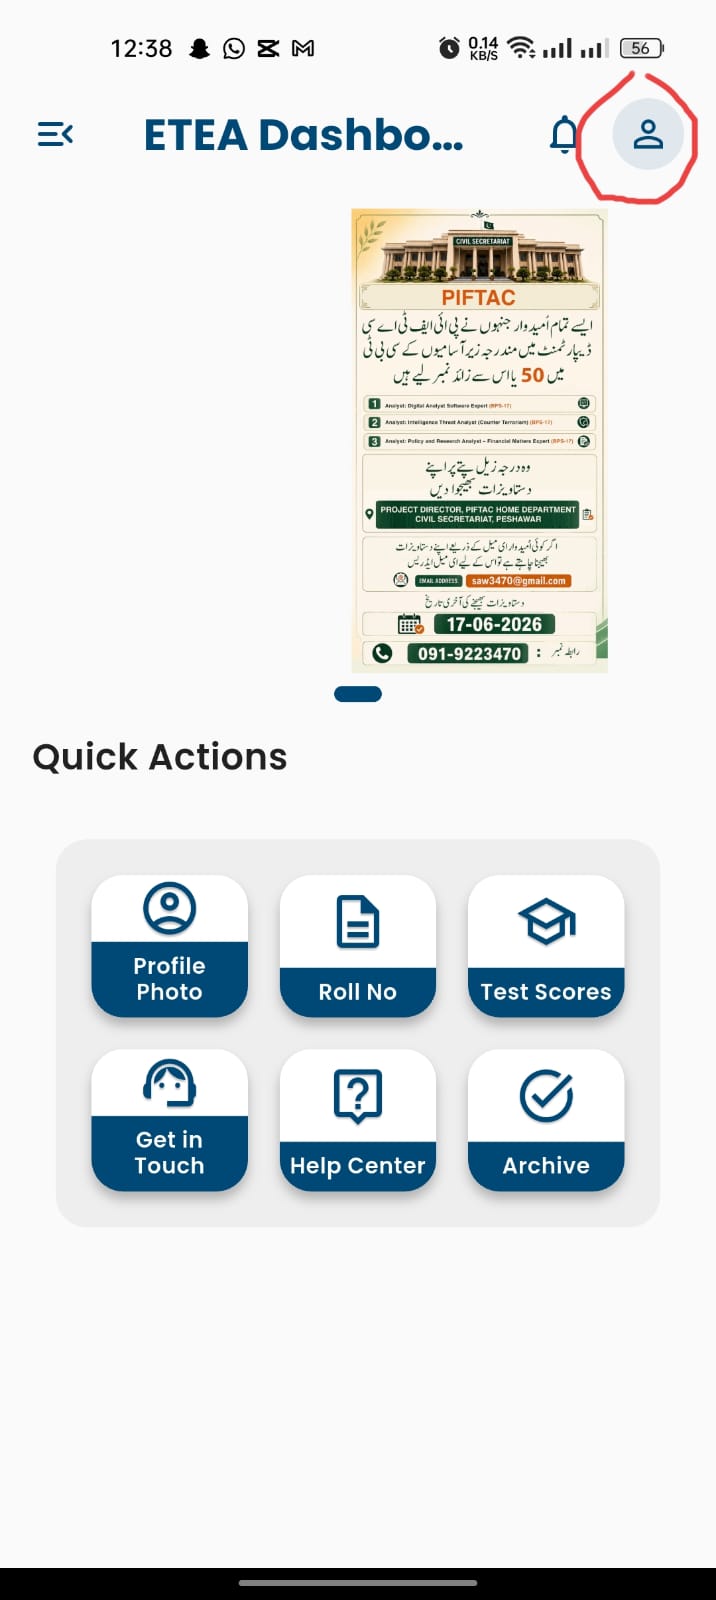
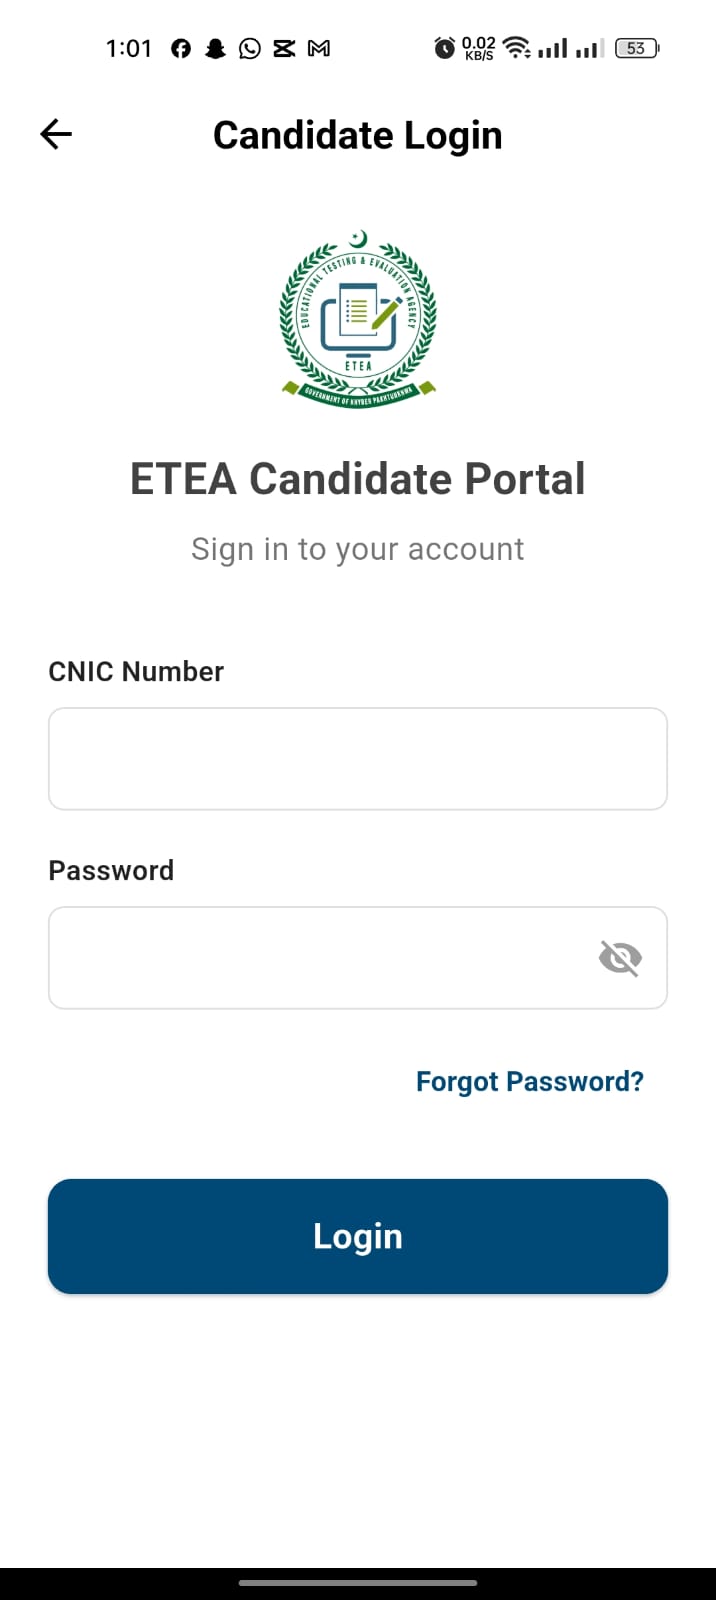
Install and open the app, then tap the profile icon in the top-left corner to reach the sign-in screen:
Log in with the same CNIC and password you used to register on the website:
Tap the circular avatar, and the camera opens with on-screen directions to move your head. Follow them, and when the capture succeeds, tap Upload. The photo appears automatically on your website application.
Step 9: Apply for the Test
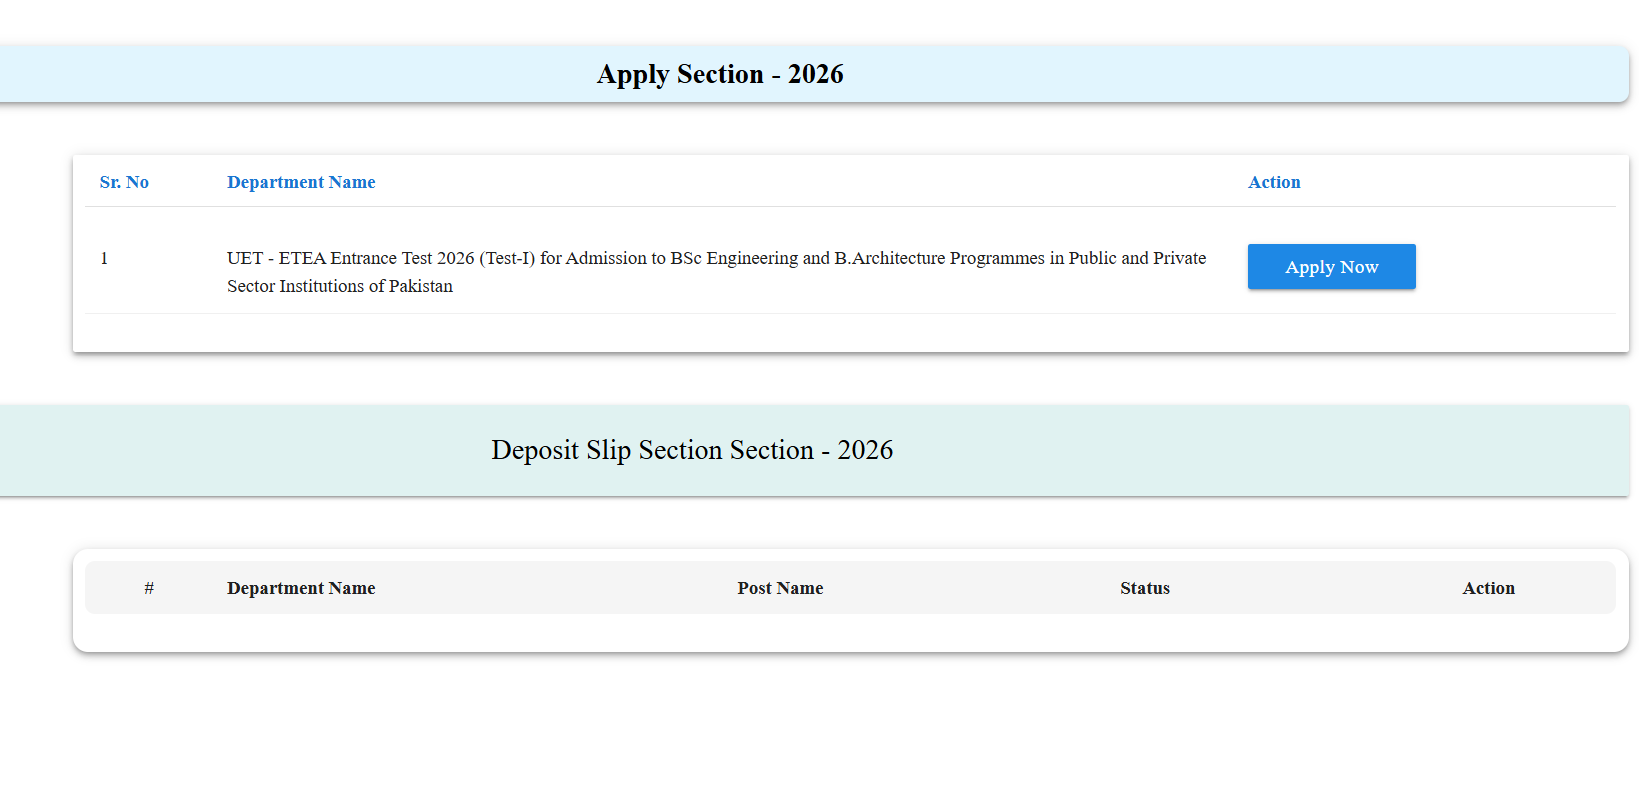
Back on the website, click Apply in the left panel. Your application for the UET-ETEA Entrance Test appears — press Apply Now.
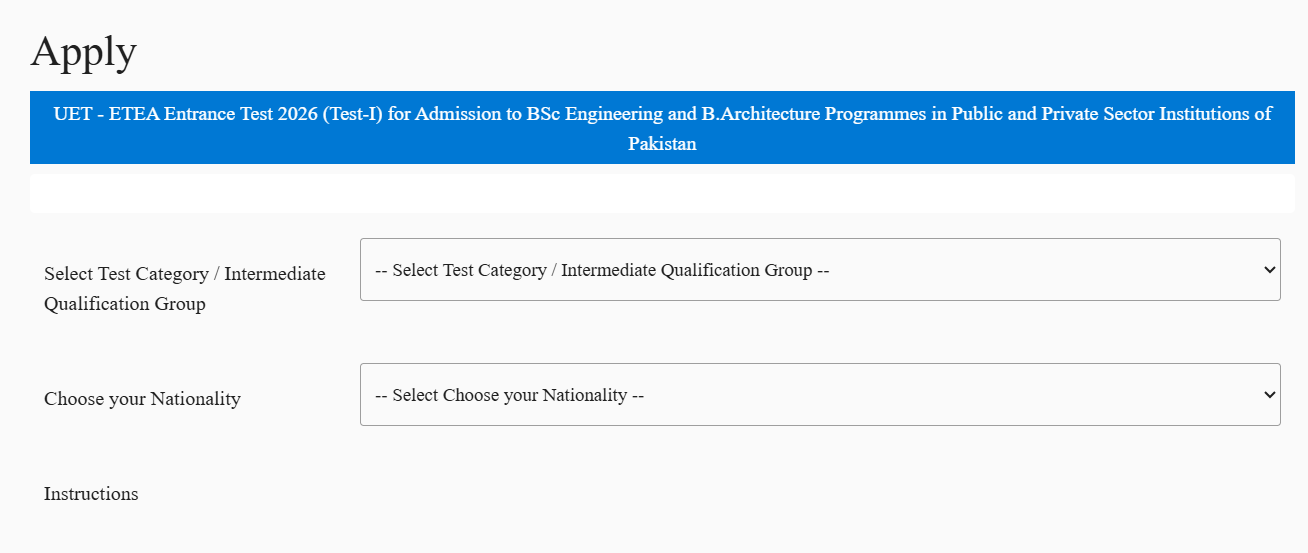
The form asks for a few final details — most importantly your Test Category / Intermediate Qualification Group (e.g., FSc Pre-Engineering, FSc Computer Science, DAE) and your nationality:
Step 10: Pay the Fee
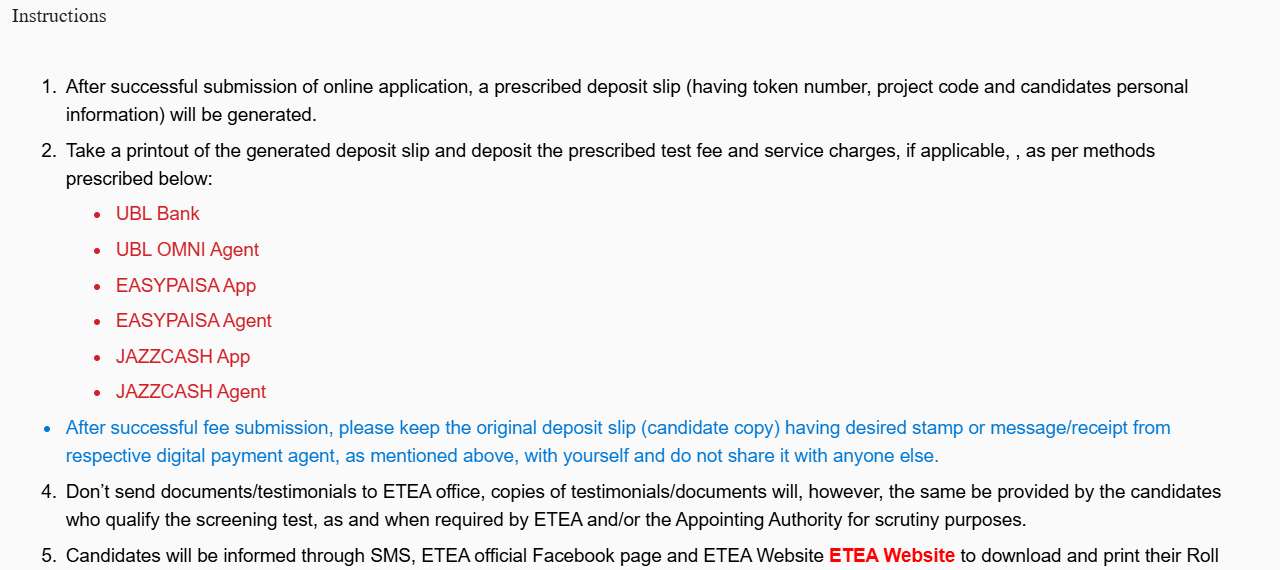
After submission, the portal generates a deposit slip carrying a token number, project code and your personal information. Download and print it, then pay the test fee through any of these channels using the consumer/token number written on the slip:
Bank counters & agents
- UBL Bank (any branch)
- UBL OMNI Agent
- Easypaisa Agent
- JazzCash Agent
From your phone
- Easypaisa App
- JazzCash App
- Pay via the consumer number on your slip
Step 11: Verification & Roll Number Slip
Once the fee is processed, your application status on the dashboard changes from Not Verified to Verified automatically — nothing more to submit. Don't post any documents to the ETEA office; originals are only checked later if you qualify.
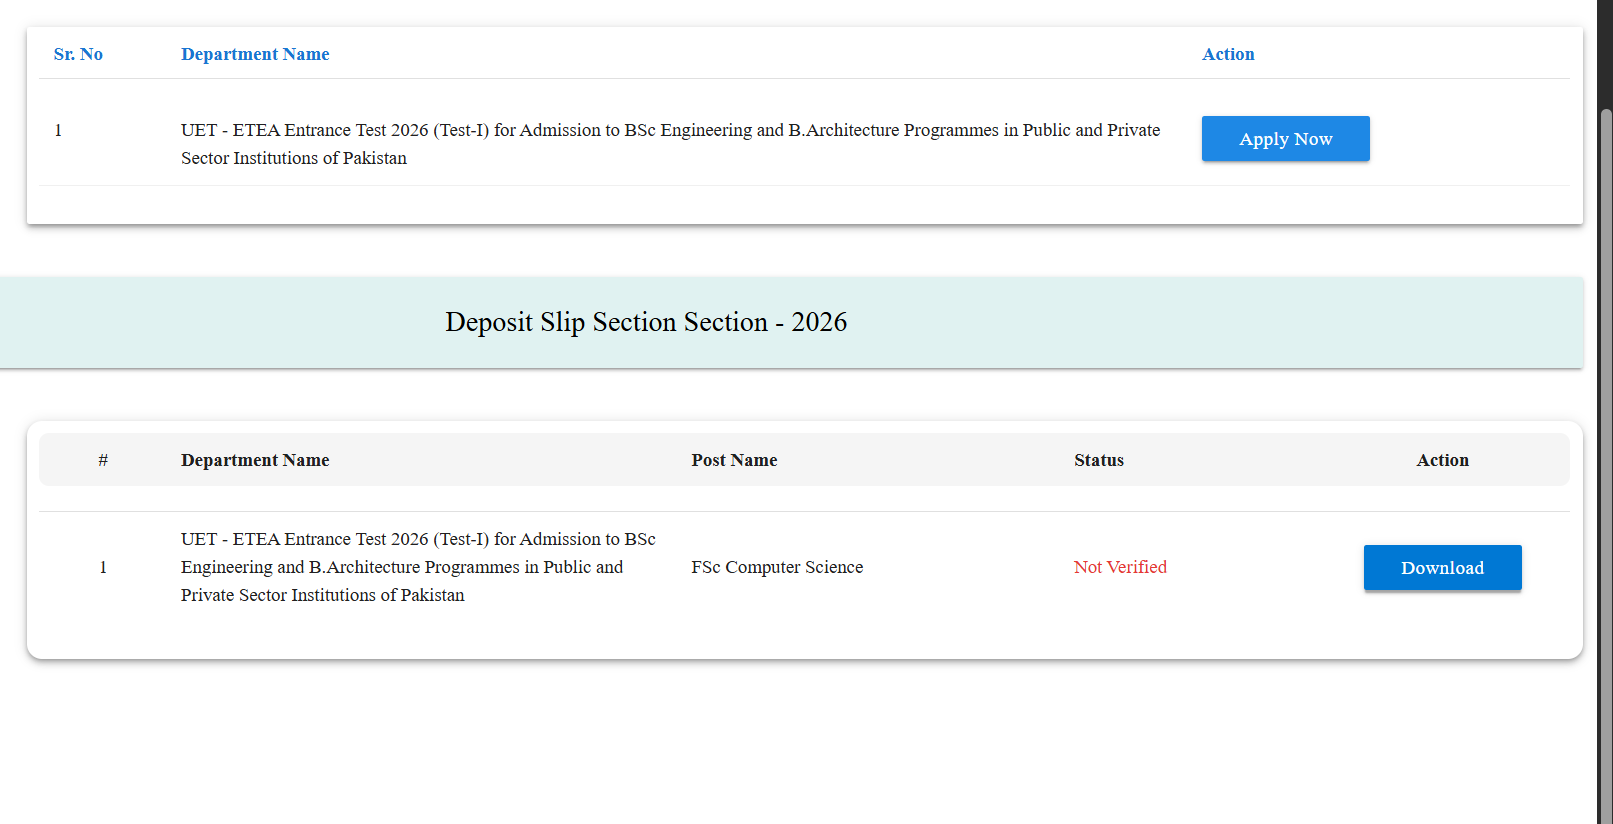
When roll number slips are uploaded, ETEA informs candidates by SMS, email and its official Facebook page, and you download the slip from the website. The test date, time and venue are printed on the roll number slip — no call letters are sent by post or courier.

Applying from a Mobile Phone
All the screenshots above are from a laptop, but plenty of students apply entirely from a phone — and that works fine. The ETEA website is mobile-responsive; the layout just rearranges itself:
- The top menu collapses into a hamburger (☰) icon — tap it to find APPLY ONLINE, then tap it once to expand the same test links
- Sign-up and profile forms show the same fields stacked vertically — scroll down instead of across
- The dashboard's three step-cards and the left side panel appear stacked at the top of the page rather than beside the content
- The photo step is easier on mobile — you're already on the phone where the ETEA app runs
Two small tips for mobile applicants: use Chrome in portrait mode rather than a mini/lite browser (some in-app browsers break the form dropdowns), and if a table like the deposit-slip section looks cut off, swipe it sideways — it scrolls horizontally. Every step, field and button is otherwise identical to what's shown in this guide.
Frequently Asked Questions
What do I need before applying?
Your CNIC/B-Form, SSC and HSSC marks details, an active (non-ported) mobile number, an email address, and an Android phone for the ETEA app photo step. Have your domicile district ready too — you'll pick its zone during sign-up.
Can I change my photo or personal details later?
No. Sign-up credentials and the app-captured photo are permanent. If you make a genuine mistake in other profile fields, contact ETEA support before the application deadline — but don't count on it being fixable.
How much is the fee and how do I pay it?
The exact fee is printed on your auto-generated deposit slip. Pay it at UBL Bank, through a UBL OMNI / Easypaisa / JazzCash agent, or from the Easypaisa or JazzCash app using the consumer (token) number on the slip. The portal status becomes Verified automatically after payment clears.
When do I get my roll number slip?
When ETEA uploads admit cards, you'll get an SMS and email to download your roll number slip from etea.edu.pk. If nothing arrives, check the site yourself a few days before the test date — entry to the test hall requires the printed slip.
I have DAE, not FSc — can I still apply?
Yes — the apply form's Test Category dropdown includes DAE and other intermediate qualification groups. Select the group that matches your certificate; eligibility details are in our UET Peshawar admissions guide.